
As an Amazon Associate, I can earn from qualifying purchases. Learn More
Were you able to prepare the Sweet Vanilla Strawberry milkshake without ice cream? Which flavor did you enjoy the best after substituting table sugar with honey? If both were great, I’m so glad and hopefully, you’ll find these extra recipes on how to make a milkshake with a blender helpful as well.
My main reason for continuing on this topic is because I want you to appreciate making your flavors of the cold dessert. Then, at the very least you won’t need to depend on the Five Guys, Margie’s Candies, or iZZY’S Ice Cream.
Besides, if you know how to make a milkshake, you can save a lot of $4.79 change. It also blesses you with a chance to enjoy the yummy snack any time of the year you crave, regardless of the weather.
Still, I don’t know if you know that a milkshake is one of the best solutions if your kid fusses a lot about eating particular fruits or milk. Nearly all kids love milkshakes. So, why not take advantage of that and sneak in that banana, pineapple, or orange he’s always picky about.
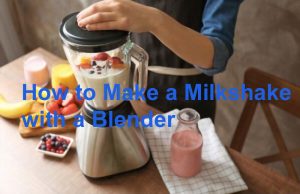
How Do You Make A Milkshake With A Blender?
First of all, a milkshake is just a blend of three ingredients- Ice cream, some milk, and the flavoring of your choice. So, it’s quick and straightforward to make if you have any blending or mixing machine.
Yes, there are those personalized milkshakes, but if you’re just making a basic recipe, a blender isn’t even a must since all materials are soft. A good example is where you’re only using ice cream, milk, and chocolate syrup.
Meanwhile, you’ll need the best blender for milkshakes with solid flavor combos like frozen berries and ice. Of course, it necessarily doesn’t have to be a Vitamix or Blendtec but any model that can perfectly pulverize ingredients.
In any case, let’s jump to our main topic and look at how you can make your favorite milkshake flavors with the kitchen blender.
Summary Points
How to make a milkshake with a blender
Add whole milk, vanilla ice cream, and vanilla extract into a blender’s container. Blend for about 30 seconds or until smooth. Pour into the drinking glasses and top with a layer of frosting if desired. Serve immediately.
How to Make a thick milkshake
Just add more ice cream! If you want the shake even thicker, use heavy whipping cream in place of milk. Ice and frozen fruits only offer temporary thickness, then water it down after melting.
Which milk is the best for milkshakes?
Blend the ice cream with whole milk or a mixture of milk and half-and-half. Use coconut milk or Almond milk for a dairy-free milkshake
Which is the best blender for milkshakes?
Ninja Professional Plus is affordable, supports automated blending, has a large72-oz jar, plus can crush ice and frozen berries faster. Thus, you can make a milkshake for the whole family without needing to pay much.
Complete Guide: How to Make a Milkshake with a Blender
For reference, we’re going to use two of my favorite recipes that enjoy very much. However, at the end of it, I will add several variations that you can try and compare where the best flavor lies.
Recipe 1: Classic Sweet Vanilla Milkshake
| Serve Time: | Breakfast, Lunch, Early Evening Snack |
| Cuisine: | American |
| Serving Size: | 2 |
| Prep Time: | 10 Minutes |
| Calories: | Approx. 400 |
| Nutrition: | Sugar, Fat, Protein, Cholesterol, Fiber, vitamin A, Vitamin C, Calcium |
Ingredients:
- 2 cups vanilla ice cream
- 3 tablespoons vanilla Extract
- cup whole or semi-skimmed milk
- Whipped cream (optional topping)
You also need a blender to break up the ice cream and help it combine with the milk and mix-ins. As was mentioned, it doesn’t have to have high power since the ingredients are liquids and soft solids. Even a handheld immersion blender can do the job if that’s what you have at the time.
Directions
- Add milk, vanilla extract, and vanilla ice cream into the blender’s container
- Set your blender to the lowest speed setting
- Turn the blender on and slowly increase to the maximum speed
- Blend the mixture for 30 seconds or until smooth
- Stop the machine. Then, pour the shake in the glass while still thick. If desired, you can top with whipped cream and sprinkles
- Serve immediately before it starts to melt
Ps. If the ice cream is very hard, you’ll need to use more milk for better blending. But again, if you use too much milk, you’ll dilute the concentration of the ice cream, which in turn will thin your shake. So, make sure the ice cream you’re to use is semi-solid: soft but not hard or runny.
Recipe 2: Hearty Berry Milkshake with Vanilla Flavor
| Serve Time: | Breakfast, Lunch, Early Evening Snack |
| Cuisine: | American |
| Serving Size: | 3 |
| Prep Time: | 9 Minutes |
| Nutrition: | Sugar, Fat, Protein, Fiber, Cholesterol, antioxidants, Vitamin C, Calcium, Potassium |
Treat yourself and the family with a hearty and healthy mixed berries milkshake. The shake doesn’t use ice cream, rather the constituent ingredients of the ice cream.
Ingredients:
- 1 cup milk
- 2 tablespoon and 2 teaspoons white sugar
- ½ teaspoon vanilla extract
- 1 cup frozen mixed berries
- 2-½ cups ice cubes
Directions:
- Put the milk, sugar, vanilla, berries, and ice cube in the blending. Then, secure the lid
- Set the variable speed to the lowest “1” setting
- Turn the blender on and slowly increase the speed to the maximum
- Blend the mixture for 30-45 seconds or until desired consistency.
- Turn the blender off and pour the shake into a glass. You can garnish with a dollop of whipped cream, frosting, or sprinkle s if desired.
- Serve immediately.
Notes
I prepared the two recipes with the classic Vitamix 5200. Hence, the reason I emphasized resetting the variable speed dial to “1” before commanding it to start processing.
Unlike the later designs from the brand, this machine doesn’t ramp up the speed when you start the motor. It usually begins where it left the previous time (current position of the variable dial). In case you have forgotten and left it on the highest setting, the motor will thrust instantly and splatter the ingredients to the walls of the container.
If the container had ice cubes and frozen fruits at the bottom, this abrupt movement could cause the motor to stall or even burn out. So, it’s also good to always start arranging your ingredients from the light to the heavy ones. Not the other way round.
Extra Milkshake Variations
Here are 4 variations that you could play around with and taste their flavors. Don’t worry, you really can’t go wrong…
Hot Chocolate Milkshakes
Who said you can only enjoy milkshakes when cold? This recipe lets you enjoy your chilled creamy drink when warm. You just need to combine some full-fat milk and plain chocolate on a heating pan until the mixture melts and mix smoothly. Then, pour in a blender with vanilla ice cream and process all the ingredients until evenly combined.
Quick Banana Milkshake
This can cool you down if you crave a healthy milkshake but don’t have much time or ingredients. It’s a great way to supplement your body with not only protein and carbs, but also calcium, magnesium, and potassium.
The milkshake needs only a banana, milk, ice cubes, sugar, and 5 minutes to prepare. You’ll notice it doesn’t have real ice cream, rather its ingredients.
Peanut Butter Milkshake Supreme
For this one, the idea is to make a super-thick shake treat while using your blender. It will provide you with carbohydrates for energy, proteins for development, Niacin to boost brain function, among others.
To make the milkshake, you only need a generous amount of vanilla ice cream, a splash of milk, and some creamy peanut butter. Then, blend the mixture for about 45 seconds or until perfectly smooth.
The Perfect Strawberry Milkshake
This is a perfect solution to refresh up on a hot summer day. You only need some milk, fresh strawberries, vanilla ice cream, and some sugar. It’s quick and straightforward to make as all the ingredients are soft. A good blender should be able to break everything else up and produce a perfect blend in under 30 seconds.
How to Make Your Milkshakes Thicker
Truthfully, there’s nothing like a bad milkshake. Some people like it when thin and others enjoy best when thick.
As I mentioned in the previous post, I always make my milkshakes thick and creamy. Hence, the reason I use a little bit of milk that’s only enough to help the ice cream blend.
For me, that’s enough but if you wanted to make your shake even thicker, you could use heavy whipping cream in place of milk.
It’s worth noting there’s a huge difference in making thick milkshakes and smoothies. For a smoothie, we usually say you can thicken the blend by adding ice or frozen fruits. However, this is not the case in milkshakes as we don’t want the ice to melt and thin it out further.
So, if you want your milkshake to be thick, consider using a higher ratio of ice cream than milk. But most blenders tend to struggle to plow through materials that have high viscosity. Thus, it will now be the best time to put the tamper that came with your machine into good use.
What Is The Best Blender For Milkshakes?
Technically, different blenders come with varying features and they offer different capabilities. Also, there are so many different flavors of milkshakes, with some having only basic ingredients and others hard add-ins. So, the perfect blender for a milkshake depends on the ingredients used.
Regardless, Vitamix 5200 is the best if you want to make a thicker milkshake. For one, it has the classic tall container with a slender profile that allows you to process even two cups and below. So, you won’t need to use large amounts of ingredients as with the blenders with wider containers.
Another thing, the Vitamix blender comes with a tamper and a removable plug (on lid) where you can use the accessory. So, you can help push the stubborn foods into the spinning blades without having to stop the motor.
Meanwhile, Ninja BN701 Professional Plus is one of the best options if you want your milkshake to have ice and frozen fruits. Like many countertop blenders from the maker, this machine has the exclusive total crushing blades and a powerful 1400-watt motor. Thus, doesn’t disappoint when it comes to dealing with icy foods.
Even better, the blender has Auto-iQ technology that lets you work without guesswork using dedicated preset programs. Two of these functions are on making ice cream and crushing ice. Thus, you can make your milkshakes any time without worrying if you have ice cream or not.
Still, the Ninja blender sells under a hundred dollars, which makes it a great alternative if you’re unable to afford a high-power Vitamix or Blendtec.
Final Thoughts
A milkshake is not just a drink dessert but also a means to add nutrients to the body. It’s one of the best ways of sneaking fruits into your kids’ diet since many of them despise smoothies. So, don’t take learning to make a good smoothie as just about saving that money you would have used at a candy shop.
But again, making the best milkshake starts with the proper ingredients, then the tool and method of preparation. If it’s the ice cream, remember it’s the base of your shake. Do make sure you use the good stuff, full-fat kind if possible.
Also, don’t forget the ice cream has the highest impact on how thick your milkshake will be. So, the more it is, the better. The purpose of the milk mostly is to facilitate blending or mixing with the other ingredients. hence, start with very little and only add more when needed. Otherwise, you’ll have a runny shake that’s nothing more than a glass of vanilla or chocolate milk.
As for the aspect of tools, a basic milkshake doesn’t exactly need a blender as you can whisk in a bowl and still get results. But if you need to customize a unique flavor that will need tougher ingredients like ice and frozen fruits, a perfect machine is a must.