As an Amazon Associate, I can earn from qualifying purchases. Learn More
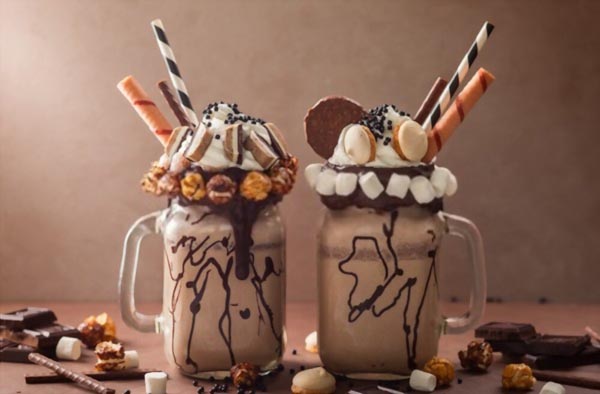
Well, the skies have finally started to clear, and that means it’s time for more milkshakes and lesser tea. Of course, the summer is still some weeks away, but the air is now warmer. So, you got no cold excuse to deny your little ones their favorite chocolate milkshake. Neither should you give an excuse that the “Hershey bottle is empty” as in this recipe, we’ll be making our chocolate milkshake with cocoa powder.
Needless to say, it’s no crime to make your milkshake without the chocolate sauce. Some people do it, but they use chocolate ice cream instead of Vanilla.
While you’ll still get a good chocolate shake, the punch of the chocolate flavor will not be as strong as when you have included chocolate syrup. Ice cream is just a frozen mixture of milk, sugar, and Vanilla or chocolate powder. So, blending your chocolate ice cream with only milk will be like diluting the existing chocolate flavor.
Meanwhile, when you use a Vanilla ice cream and chocolate sauce combo, you’re able to control the level of chocolate flavor. Don’t forget, ice cream is the characteristic ingredient, milk the base, and the syrup your flavoring. So, the more chocolate sauce you’ll add, the more chocolate sweetness the shake will have.
How to Make A Chocolate Milkshake With Cocoa Powder
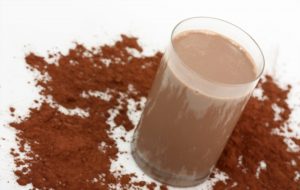
If you have some cocoa powder sitting somewhere in your cupboard, you can make some really delicious, thick, and creamy chocolate milkshakes. The trick is to first make chocolate syrup so that you can then blend it with the ice cream and milk.
Making Chocolate Syrup
There are two ways you can make the chocolate flavoring for your milkshake: with butter or without butter. When you go with the butter option, you’ll have a thicker mixture, like fudge sauce, and that will give you a more creamy milkshake.
To make the “Chocolate” fudge sauce:
You’ll Need
- 2 tablespoons granulate sugar
- 1 heaping tablespoon cocoa powder
- 1 tablespoon butter
- cup (2 tablespoons) milk
Directions
- Put some butter in a small saucepan and bring to a burning (medium heat) stove to melt
- Pour in some milk and whisk the mixture
- Add cocoa powder and sugar, then whisk continuously, breaking up any lumps that form, until the mixture is smooth or else thickens into a sauce.
- Remove the chocolate sauce from the heat, then whisk for about 30 seconds to fasten cooling.
If you also don’t have any butter in the house, you can create a cocoa solution, though it won’t be as creamy as with butter. To make the solution, you just need to simmer together milk, cocoa powder, and sugar while stirring/ whisking thoroughly to dissolve everything. You can also use water in place of the milk, but I won’t recommend it as it will make the solution even thinner.
(i) Making Creamy Vanilla Chocolate Milkshake With a Blender
| Recipe: Creamy Sweet Vanilla Chocolate Milkshake | |
| Course | Beverage, Dessert |
| Cuisine | American |
| Serving Size | 1 |
| Total Time | 10 Minutes |
| Calories | 650kcal |
| Nutrition | Sugar, Fat, Protein, Calcium, Sodium, Cholesterol |
Now that you have the chocolate sauce, the final step is to make the milkshake. To do that:
You Need to Have:
- 1 cup (3 scoops) vanilla ice cream
- to cup milk
- 3 tablespoons homemade fudge sauce
Directions:
- Add the milk, Vanilla ice cream, and some of the “cocoa” sauce into the blender’s jar
- Set the variable dial to the lowest speed setting
- Turn the machine on and slowly raise the speed to the maximum
- Blend the Mixture 20 to 30 seconds or until smooth
- Turn the machine off, then pour the shake into a glass. If you prefer, top with whipped cream or drizzle the homemade fudge sauce that remained.
(ii) Making Creamy Vanilla Chocolate Milkshake Without a Blender
Put simply, it’s good to have the best blender for milkshakes can be grainy or lumpy if the ingredients don’t mix up well. Lucky, if I may say, our recipe has all liquidy materials after pre-making the cocoa sauce. So, the ice cream is the only thing that needs some beating to break apart and mix with the rest.
But then, what if your blender fails to start and you have never thought of needing a mixer… will you put the materials back in the freezer and leave your kids still panting for the dessert you had already promised them? No, you shouldn’t.
It’s not a must you use a blender to make a good milkshake, especially when all the ingredients are soft. You only need a clean closable jar like that we used when making a protein shake.
Instructions:
- Scoop your Vanilla ice cream into the jar and allow it to melt into a gooey texture- not hard or runny. You can leave it on the table for some minutes or microwave it for about 15 to 20 seconds
- Add milk and the chocolate syrup you made in Step (A) above
- Secure the lid on the jar, and shake vigorously
- Shake, again and again, until the three ingredients are properly mixed. If you notice any stubborn ice cream lumps, mash them against the edge of the jar with a spoon. Then, give the mixture a final shake
- Now pour the milkshake into a drinking glass, and enjoy!
Notes:
When your homemade chocolate sauce sits on the table for a while, the liquid will start to evaporate and the sauce thickens. Therefore, as you scoop with the tablespoon, don’t over-do it as the chocolate flavor is still there.
Otherwise, your milkshake will be too chocolatey, which, true, is sweet but not great for your health. Remember Cocoa contains caffeine, which means eating large amounts could trigger related side effects, like sleeplessness and fast heartbeat.
Recommended Product:
Vitamix Pro 750 Smart Countertop Blender
Summary Features:
- 2.2-peak horsepower motor
- Frozen Dessert preset-program
- All-meta drive system
- 10x incremental speeds
- Grinding and Hot soups
- 64-ounce low-profile container
- Hardened 4-leaf stainless steel blades
While it’s an oldie, the Pro 750 is still a favorite to the lovers of classics. The blender was the first on the line of Next Generation (or simply G-Series) that Vitamix innovated to address some of the issues of the flagship model 5200.
One of these issues was the storage, whereby the classic 64-oz jar was pretty tall in that the whole blender couldn’t fit in the standard cabinet. However, Vitamix 750 introduced a low-profile container that’s like 3-inch shorter than the previous one. So, you can slip the blender (with the jar mounted) under the standard 18-inch kitchen cabinet without a hassle.
Another solution Pro 750 brought with it concerns the blending noise. Unlike the C-series and the later product lines, the G-series blender has a restyled airflow design and vibration dampening technology. The two were the key to muffling the noise, though there was also the metallic motor base (currently unavailable).
In addition to the two, Vitamix 750 has a powerful 2.2-horsepower motor that can handle even the toughest tasks where most regular blender struggles. It has both manual and automated blending functions, thus, you can enjoy walk-away convenience as well.
Did You Like the Shake?
Which method did you use for your milkshake, a blender or shaking jar? Did you like the results? The recipe is pretty easy to make, but the treat should be yummy and refreshing. Hopefully, the guide was helpful and now you never have to deny your nieces a chocolate milkshake because the Hershey’s syrup bottle is empty. You have Cocoa!